.png?width=141&height=141&name=Transact%20(1).png)


Once upon a time, not so long ago, video conferencing was a 'nice to have' element of an organization's communication strategy. Unified communications today is a very different story, and without video conferencing tools and applications, most businesses would be facing a less than happy ending.
Work From Home (WFH) is evolving. With the advent of Work From Anywhere (WFA), businesses can conduct meetings internally and externally with any number of participants, from any location, through video calls and conferencing systems. With the number of different solutions available, including technologically advanced video conferencing software, users can continue to work productively in real time - as though a pandemic never happened!
The importance of maintaining high quality video conferencing
Inadequate video quality can derail a meeting in no time, and results in a poor user experience. It limits productivity, keeps teams from achieving goals, and frustrates an already-frustrated IT department. Of course, sometimes bad quality video just happens, but when it happens repeatedly, you may need to look at your software systems, or the conferencing solutions you're using.
But there are some things you can do to address concerns with video quality ahead of time. In this blog, we'll address the most common technical issues affecting video quality, as well as some simple less technical tips and tricks that can enhance meetings and achieve a quality user experience.
Technical issues
In reality, there are only a few reasons why the video quality is poor, all of which can be resolved fairly painlessly.
Problem 1: Your wireless network
A bad WiFi signal can be the number one culprit in poor quality video. Even though internet service providers can enhance the range and consistency of WiFi signals, sometimes your network can still experience interference from other devices or weakened signals from older, outdated equipment. Dead spots, slow service, bad security updates and glitchy routers can turn a video conference into a pixelated mess.
Solutions:
- Try a direct connection. Sometimes you can avoid WiFi problems altogether by connecting your computer directly to the router with an Ethernet cable. Obviously one disadvantage is less ability to move around, but it’s an option for desktop computers and TVs — and even laptops when a stable connection really matters. If your laptop is ultra modern, and doesn't have an ethernet port, you may have to buy an adapter.
- Try a different channel on your wireless network. This involves slightly more knowledge about your WiFi router but may earn you a gold star by not having to call IT. Wireless networks run on different radio frequencies - or channels. When you and those around you are on the same channel, your signals can interfere with each other. Newer routers automatically scan for and choose the clearest channel. To change it, you’ll need to dig into the administrator website or app — the same place you go to update the router’s software. The channel settings may be hidden under “WiFi setup” or “advanced” settings.
Problem 2: An overburdened CPU
When the central processing unit on your computer is overworked, for example by running too many apps or programs it may become hot, slow down considerably, and freeze programs. This negatively affects both audio and video quality.
The incredibly popular video conferencing platform, Zoom is known to put a strain on CPU usage while participating in a meeting. This includes users of Windows, Mac, or even Chromebook. Zoom's enhancement features like noise suppression and background images run in the background and can contribute to higher CPU usage, especially when there are multiple video feeds going all at once.
Solutions:
- Check the CPU usage. On Windows 10, use the CTRL/ALT/DELETE function to view the task manager, or right-click on the taskbar to choose it. This will launch a list of apps that show what applications are using up the CPU. For Mac users, open the Activity Monitor app. and check "CPU" to sort a list of which apps are using the most CPU power. Once you can view your CPU usage, try closing down any apps that are causing issues, and see if video quality improves.
- Try a restart. After clearing out unnecessary apps, try restarting your computer to see if you can get rid of a persistent error. If problems continue to happen, it could be time to look into upgrading your computer or workstation.
Problem 3: Microphone or camera problems
Sub par call quality can often be related to your microphone or camera. This could be due to either user error - like accidentally covering up the microphone (or not having it turned on at all) or leaving fingerprints on the camera that create a blurred view.
Solutions:
- (Camera) Adjust your screen resolution. When the image quality is blurred and distorted during a webcam broadcast, lowering your resolution can sharpen the image projection. To lower your resolution, right-click on your desktop and click "Properties." Choose "Screen Resolution," from the available prompts. Lower the screen resolution one step below where it is currently set and test the image quality. If it needs further sharpening, repeat the process until you achieve the desired clarity. If you look fuzzy in your self-view, install a better quality external USB webcam.
- (Microphone) Consider an external microphone. While laptop microphones have improved in quality over the years, even a relatively inexpensive dedicated external microphone may improve sound quality enormously. But ensure it's actually connected. Sometimes your computer will stick with its default audio input device unless you change it manually. On a Mac: Click the volume control in the menu bar and select “sound options”and make sure that your external microphone is selected from the list. Then ensure that the “Input level” bar is moving to indicate that the computer is picking up sound, and adjust the volume slider. On a PC: Right click the volume icon in the taskbar and select sounds. Choose the “Recording” tab and choose your external microphone from the list.
Problem 4: Low bandwidth
Low bandwidth will affect the quality and content of a video conference. Additionally, latency and jitter can cause choppy images and affect call quality.
Solutions:
- Check speeds and internet plan. The first step in determining if your bandwidth is fast enough, is to run a speed test. If you need more speed, the best way will be to upgrade.
- Check your hardware. Try resetting the modem and router. Check the other computers in your house to see if their internet is slow, too. If the problem only happens on one computer, the problem is that computer, not your router or modem.

Not-so-technical tips for a high quality video call
Aside from the more technical audio/video aspects, video conferences can go from woeful to high quality with a few simple tricks using the existing features of both your equipment and the meeting platform you're using.
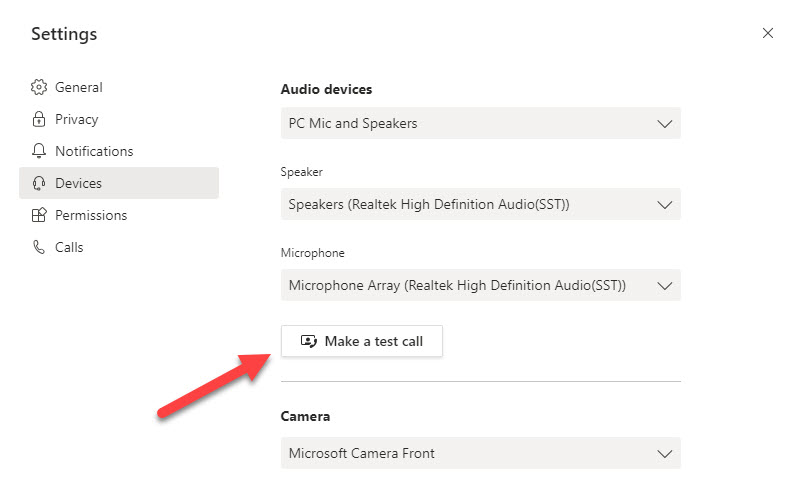
Test your audio and video
The first thing to do before starting a video call is to make sure both your video and audio devices are connected and working properly. Most video conferencing solutions have a test call capability. Look under the options or settings menu in your video conferencing app. For example, in Microsoft Teams, you can click on devices to check and make a test call.
Camera position
In a time when we all feel disconnected from colleagues and clients, it’s important to appear engaged in your conversations. In a face-to-face situation, you would do this by making eye contact. On a video call , it's by looking at your camera. To appear professional and natural on video, it's important to make sure the camera is positioned at eye level. You never want to look like you are talking down to someone and you also don’t want to feel like someone is talking down to you. You can easily change your workstation setup by positioning your laptop or tablet on a stack of books for example, or an adjustable height stand. If you’re mostly using your phone for calls and conferences, a tripod can be affixed to a variety of surfaces.
Camera quality
The cameras built into computers often don't produce quality video. For the best quality during a video conference, a dedicated webcam will likely produce a higher quality. Even the camera on your smartphone usually produces a far superior image than your laptop. For example, the iPhone 11 has a 12MP 'TrueDepth' front-facing camera which displays a better image than the 720MP FaceTime camera on a new, 16-inch MacBook Pro.
Ample light and neutral background
It’s best to make a video call in a location with as much natural light as you can. However, if your location doesn’t have plenty of sunlight, try to sit under some soft florescent or LED lighting.
It’s best to choose a spot with a neutral background, nothing cluttered or distracting. A blank wall would be perfect, but if you can't find a suitable background there are options on most video conferencing platforms that can artificially create one. If you’re using Zoom, for example, you can even switch to a virtual background.

Pre-meeting preparation
Before conducting a meeting, it's good practice to prepare all your discussion material and documents ready beforehand. If you need to share a document with colleagues, send it before the call and make sure everyone has access to all the necessary data prior to the video meeting. This way, you won’t have to spend the first few minutes of the call waiting for everyone to get up to speed.
Use the mute button when not speaking
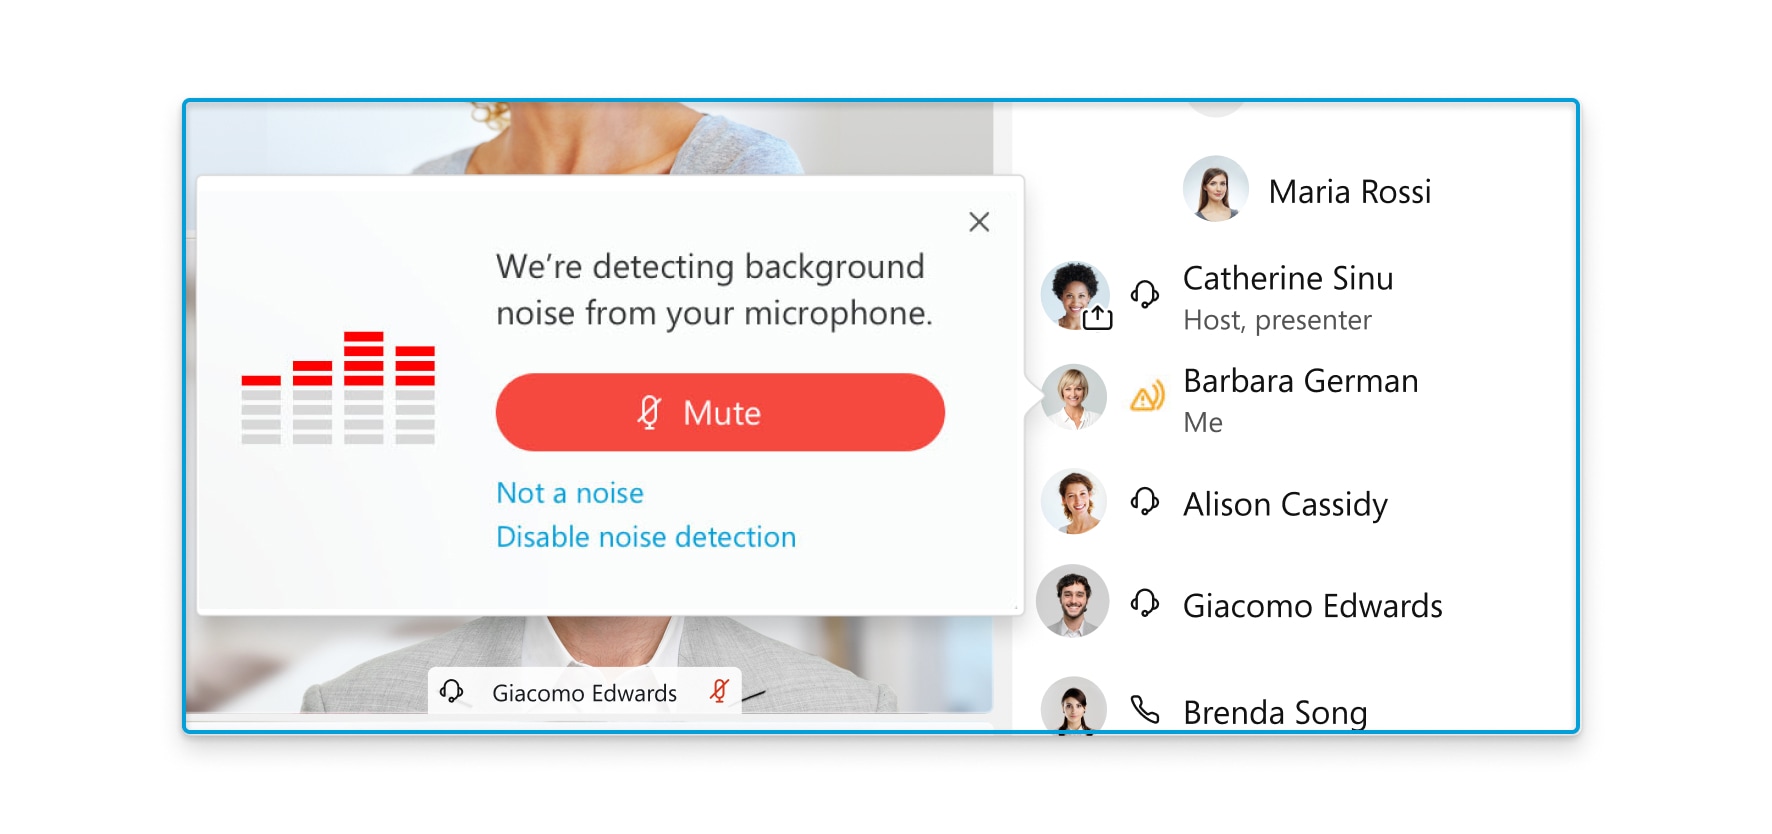
When you’re in a video meeting with multiple participants, it’s best to keep yourself muted most of the time. Muting yourself when it isn’t your turn to speak eliminates any background noise, which is sometimes unavoidable when working from a home environment. Muting can also help you to avoid one of the key irritations during meetings - interrupting. It’s important not to talk over others during video chats as multiple voices can sound muddled and unintelligible during virtual communication.
In the Cisco Webex Meetings app for example, it detects background noise coming from your microphone, and prompts you to mute yourself.
Why monitoring your video conferencing solution is vital
With the diversity and the flexibility of of all the video conferencing systems available today, the key to high call quality is continual performance monitoring. Without monitoring, you can experience the common problems we've covered here, such as poor video and call quality, service issues, connectivity problems during meetings and much more. When your UC environment consists of multiple collaboration tools, apps and countless remote devices, monitoring tools become even more important to help keep track of all the information and see the whole picture in real time.
Suffering from underperforming unified communications?